The Definitive Guide to Ultrasonic Cleaning of Aluminum Parts
Aluminum, prized for its lightweight properties and corrosion resistance, is a ubiquitous material in industries ranging from aerospace to automotive to electronics. However, even with its inherent durability, aluminum parts are susceptible to contamination from oils, greases, machining fluids, and particulate matter. Traditional cleaning methods can be time-consuming, labor-intensive, and sometimes ineffective, particularly for intricate geometries. This is where the power of ultrasonic cleaning comes into play. This article delves into the intricacies of ultrasonic cleaning aluminum, providing a comprehensive guide to its principles, applications, best practices, and potential pitfalls.
Understanding Ultrasonic Cleaning
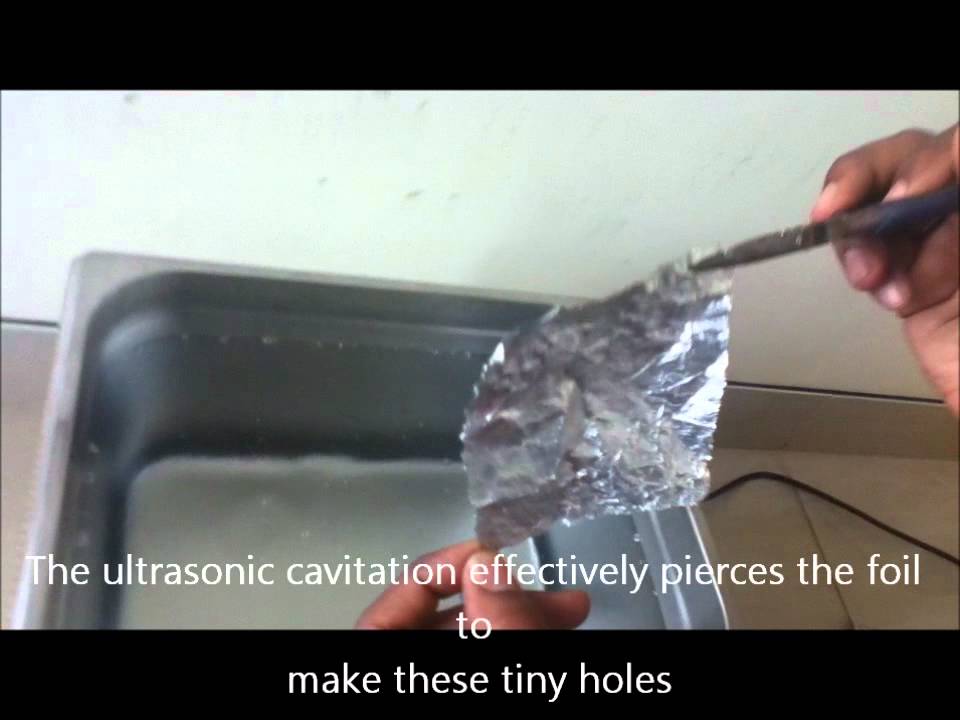
Ultrasonic cleaning utilizes high-frequency sound waves transmitted through a cleaning solution to create microscopic bubbles. This phenomenon, known as cavitation, results in the implosion of these bubbles, generating intense localized energy that dislodges contaminants from the surface of the object being cleaned. The process is remarkably effective at reaching even the most inaccessible areas of complex parts.
The Science Behind Cavitation
The cleaning action in an ultrasonic cleaner isn’t simply about vibration. It’s about the implosion of these microscopic bubbles. These implosions create localized ‘hot spots’ with extremely high temperatures and pressures, albeit for very brief durations. This energy is sufficient to break the bonds between contaminants and the aluminum surface, allowing them to be washed away by the cleaning solution.
Why Choose Ultrasonic Cleaning for Aluminum?
Several factors make ultrasonic cleaning an ideal choice for aluminum parts:
- Superior Cleaning Performance: Reaches intricate areas and removes stubborn contaminants that traditional methods often miss.
- Reduced Labor Costs: Automated cleaning cycles minimize manual intervention.
- Faster Turnaround Times: Significantly reduces cleaning time compared to manual methods.
- Environmentally Friendly: Reduces the need for harsh chemicals and solvents, promoting a safer working environment.
- Non-Abrasive: Cleans without damaging the delicate surface of aluminum components.
Applications of Ultrasonic Cleaning for Aluminum
The versatility of ultrasonic cleaning makes it suitable for a wide range of aluminum cleaning applications across various industries:
- Aerospace: Cleaning aluminum aircraft components, engine parts, and landing gear components.
- Automotive: Cleaning aluminum engine blocks, cylinder heads, wheels, and other parts.
- Electronics: Cleaning aluminum heat sinks, enclosures, and other electronic components.
- Medical Devices: Cleaning aluminum surgical instruments and implants.
- Manufacturing: Cleaning aluminum parts after machining, stamping, or other manufacturing processes.
Choosing the Right Ultrasonic Cleaner for Aluminum
Selecting the appropriate ultrasonic cleaner is crucial for achieving optimal cleaning results. Consider the following factors:
Tank Size
The tank size should be large enough to accommodate the largest aluminum part you intend to clean. Ensure there’s adequate clearance for the part to be fully submerged and for the ultrasonic waves to circulate freely.
Frequency
Lower frequencies (e.g., 20-40 kHz) are generally more effective for removing larger particles and heavy contamination. Higher frequencies (e.g., 80 kHz or higher) are better suited for cleaning delicate parts with intricate features. For aluminum, a mid-range frequency (around 40 kHz) is often a good starting point.
Power
Higher power levels generally result in more aggressive cleaning action. However, excessive power can damage delicate aluminum parts. Start with a lower power setting and gradually increase it until you achieve the desired cleaning results. It’s also important to consider the power density (watts per gallon) of the ultrasonic cleaner.
Heater
Heating the cleaning solution can significantly improve its cleaning performance, especially for removing oils and greases from aluminum. A thermostatically controlled heater allows you to maintain the optimal cleaning temperature.
Basket
A basket is essential for holding the aluminum parts in the ultrasonic cleaner. Choose a basket made of a material that is compatible with the cleaning solution and won’t contaminate the parts. Stainless steel is a common choice.
Timer and Controls
A timer allows you to set the cleaning cycle duration, while other controls may include power adjustment, degassing functions, and temperature settings.
Selecting the Right Cleaning Solution for Aluminum
The choice of cleaning solution is critical for effective ultrasonic cleaning of aluminum. Avoid harsh chemicals that can corrode or damage the aluminum surface. Consider the following factors:
- pH Level: Neutral or slightly alkaline solutions are generally preferred for aluminum. Avoid highly acidic or alkaline solutions.
- Compatibility: Ensure the cleaning solution is compatible with the type of aluminum alloy being cleaned.
- Contaminant Type: Choose a cleaning solution that is specifically formulated to remove the type of contaminants present on the aluminum parts (e.g., oils, greases, machining fluids).
- Rinsing: Select a cleaning solution that is easy to rinse off, leaving no residue on the aluminum surface.
Common cleaning solutions for aluminum include:
- Mild Alkaline Detergents: Effective for removing oils, greases, and particulate matter.
- Enzymatic Cleaners: Break down organic contaminants.
- Citric Acid-Based Cleaners: Remove light corrosion and oxidation.
Always consult the cleaning solution manufacturer’s recommendations for proper concentration, temperature, and usage instructions.
The Ultrasonic Cleaning Process: A Step-by-Step Guide
Follow these steps for effective ultrasonic cleaning of aluminum parts:
- Pre-Cleaning (Optional): Remove any gross contamination (e.g., large debris) from the aluminum parts before placing them in the ultrasonic cleaner.
- Prepare the Cleaning Solution: Mix the cleaning solution according to the manufacturer’s instructions.
- Fill the Ultrasonic Cleaner: Fill the tank with the prepared cleaning solution to the appropriate level.
- Degas the Solution: Many ultrasonic cleaners have a degassing function. Use this to remove dissolved gases from the solution, which can hinder the cleaning process.
- Load the Aluminum Parts: Place the aluminum parts in the basket, ensuring they are not overlapping and that the cleaning solution can circulate freely around them.
- Set the Timer and Temperature: Set the timer and temperature according to the cleaning solution manufacturer’s recommendations and the type of contamination being removed.
- Start the Cleaning Cycle: Turn on the ultrasonic cleaner and allow it to run for the specified time.
- Rinse the Aluminum Parts: After the cleaning cycle is complete, remove the aluminum parts from the basket and rinse them thoroughly with clean water.
- Dry the Aluminum Parts: Dry the aluminum parts with compressed air, a clean cloth, or a drying oven.
- Inspect the Aluminum Parts: Inspect the aluminum parts to ensure they are clean and free of any residue. If necessary, repeat the cleaning process.
Best Practices for Ultrasonic Cleaning Aluminum
To maximize the effectiveness of ultrasonic cleaning and prevent damage to aluminum parts, follow these best practices:
- Avoid Overloading the Tank: Overcrowding the tank can reduce the effectiveness of the ultrasonic waves.
- Use the Correct Basket: A basket made of the wrong material can contaminate the cleaning solution or damage the aluminum parts.
- Change the Cleaning Solution Regularly: Contaminated cleaning solution reduces cleaning efficiency.
- Monitor the Temperature: Overheating the cleaning solution can damage the aluminum parts or reduce the effectiveness of the cleaning solution.
- Avoid Cleaning Dissimilar Metals Together: Cleaning different metals together in the same ultrasonic cleaner can lead to galvanic corrosion.
- Proper Maintenance: Regularly clean and maintain the ultrasonic cleaner to ensure optimal performance. [See also: Ultrasonic Cleaner Maintenance Guide]
Potential Problems and Solutions
While ultrasonic cleaning is generally a safe and effective method for cleaning aluminum, some potential problems can arise:
- Pitting: Excessive power or the use of an inappropriate cleaning solution can cause pitting on the aluminum surface. Reduce the power level or switch to a more gentle cleaning solution.
- Discoloration: Some cleaning solutions can cause discoloration of the aluminum surface. Choose a cleaning solution that is specifically formulated for aluminum.
- Corrosion: Using a highly acidic or alkaline cleaning solution can corrode the aluminum surface. Use a neutral or slightly alkaline cleaning solution. [See also: Preventing Corrosion in Ultrasonic Cleaning]
- Ineffective Cleaning: If the cleaning solution is not properly formulated or the ultrasonic cleaner is not functioning correctly, the cleaning process may be ineffective. Check the cleaning solution concentration, temperature, and the ultrasonic cleaner‘s performance.
Conclusion
Ultrasonic cleaning provides a highly effective and efficient method for cleaning aluminum parts across a wide range of industries. By understanding the principles of ultrasonic cleaning, selecting the right equipment and cleaning solutions, and following best practices, you can achieve superior cleaning results while minimizing the risk of damage to your valuable aluminum components. Investing in a quality ultrasonic cleaner and employing proper techniques will ensure the longevity and performance of your aluminum parts, saving you time and money in the long run. From aerospace components to intricate electronic parts, the power of ultrasonic cleaning aluminum is undeniable. Remember to always consult with experts and follow safety guidelines when operating ultrasonic cleaning equipment.
