Mastering Landscape Photography Settings: A Comprehensive Guide
Landscape photography is an art form that allows us to capture the beauty and grandeur of the natural world. From majestic mountains to serene coastlines, the possibilities are endless. However, taking stunning landscape photos requires more than just pointing and shooting. It’s about understanding your camera settings and how they interact to create the desired effect. This comprehensive guide will walk you through the essential landscape photography settings, helping you elevate your images from snapshots to works of art. Mastering landscape photography settings is crucial for any photographer aiming to capture the breathtaking beauty of nature.
Understanding the Exposure Triangle
The exposure triangle consists of three key elements: aperture, shutter speed, and ISO. Each of these settings affects the brightness and overall look of your photo. Understanding how they work together is fundamental to achieving the perfect exposure in landscape photography settings.
Aperture
Aperture refers to the size of the opening in your lens that allows light to pass through to the camera sensor. It’s measured in f-stops (e.g., f/2.8, f/8, f/16). A smaller f-stop number (e.g., f/2.8) indicates a wider aperture, allowing more light to enter and creating a shallow depth of field. A larger f-stop number (e.g., f/16) indicates a narrower aperture, allowing less light to enter and creating a greater depth of field.
For landscape photography, a narrow aperture (f/8 to f/16) is generally preferred. This ensures that most of the scene, from the foreground to the background, is in sharp focus. This is crucial for capturing the intricate details of a vast landscape. However, using a very narrow aperture (e.g., f/22) can sometimes introduce diffraction, which can soften the image. Experiment to find the sweet spot for your lens.
Shutter Speed
Shutter speed refers to the amount of time the camera’s shutter remains open, exposing the sensor to light. It’s measured in seconds or fractions of a second (e.g., 1/1000s, 1/60s, 1s). A fast shutter speed (e.g., 1/1000s) freezes motion, while a slow shutter speed (e.g., 1s) allows motion blur.
In landscape photography, the ideal shutter speed depends on the scene and the desired effect. If you’re shooting in bright daylight, you’ll likely need a fast shutter speed to avoid overexposure. If you’re shooting in low light or want to capture motion blur (e.g., flowing water), you’ll need a slow shutter speed. Using a tripod is essential when using slow shutter speeds to prevent camera shake.
Experimenting with different shutter speeds can create interesting effects. For example, a long exposure can turn a choppy sea into a smooth, ethereal surface. Remember to adjust your aperture and ISO accordingly to maintain proper exposure.
ISO
ISO refers to the sensitivity of your camera’s sensor to light. A low ISO (e.g., ISO 100) means the sensor is less sensitive to light, resulting in a cleaner image with less noise. A high ISO (e.g., ISO 3200) means the sensor is more sensitive to light, allowing you to shoot in darker conditions but potentially introducing more noise (grain) into the image.
In landscape photography, it’s generally best to use the lowest possible ISO (usually ISO 100) to minimize noise and maximize image quality. However, in low-light situations, you may need to increase the ISO to achieve a proper exposure. Be mindful of the noise levels and try to keep the ISO as low as possible while still maintaining a reasonable shutter speed and aperture.
Essential Landscape Photography Settings
Now that we’ve covered the exposure triangle, let’s dive into the specific landscape photography settings you should consider when shooting landscapes.
Shooting Mode
While automatic modes can be convenient, they don’t offer the control you need to achieve the best results in landscape photography. It’s recommended to shoot in either Aperture Priority (Av or A) or Manual (M) mode. Aperture Priority allows you to set the aperture while the camera automatically selects the shutter speed. Manual mode gives you complete control over both aperture and shutter speed. Starting with Aperture Priority can be a good way to learn and then moving to manual once you understand the relationship between aperture and shutter speed. Understanding these landscape photography settings is key.
Focusing
Sharp focus is crucial in landscape photography. Use autofocus to initially focus on a point approximately one-third of the way into the scene. This will help ensure that both the foreground and background are reasonably sharp. You can also use manual focus for more precise control, especially in challenging situations like low light or when shooting through foliage. Many landscape photographers use a technique called focus stacking to achieve maximum sharpness throughout the entire image. [See also: Focus Stacking Techniques for Landscape Photography]
White Balance
White balance refers to the color temperature of your image. Different light sources have different color temperatures, which can affect the overall look of your photo. Your camera has various white balance presets (e.g., daylight, cloudy, tungsten) that you can use to correct the color temperature. Alternatively, you can set a custom white balance by using a gray card or by adjusting the color temperature in post-processing. Shooting in RAW format gives you the most flexibility to adjust the white balance later without losing image quality. Getting the correct white balance will dramatically improve your landscape photography settings.
Metering Mode
Metering mode determines how your camera measures the light in the scene. Different metering modes are suitable for different situations. Evaluative (or Matrix) metering measures the light across the entire scene and averages the exposure. Center-weighted metering measures the light primarily in the center of the scene. Spot metering measures the light in a very small area. For landscape photography, evaluative metering is often a good starting point. However, if you’re shooting a high-contrast scene (e.g., a sunset), you may need to use spot metering to ensure that the highlights are not blown out.
Additional Tips for Stunning Landscape Photos
Beyond the basic settings, there are several other factors that can contribute to stunning landscape photos.
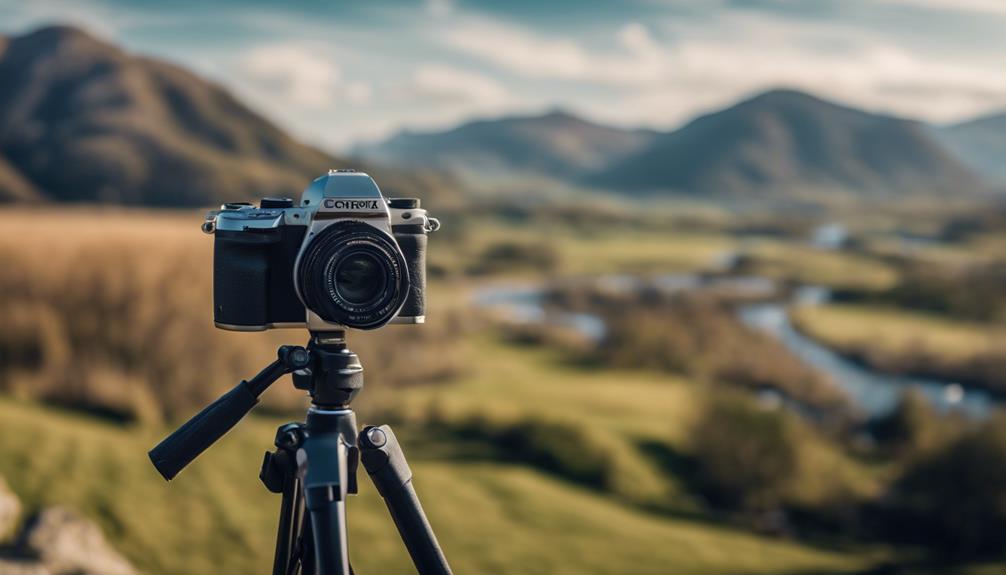
Use a Tripod
A tripod is an essential piece of equipment for landscape photography. It allows you to use slow shutter speeds without introducing camera shake, ensuring sharp images. It also allows you to carefully compose your shots and use techniques like focus stacking. A sturdy tripod is an investment that will significantly improve the quality of your landscape photos.
Shoot During the Golden Hours
The golden hours, the hour after sunrise and the hour before sunset, are the best times to shoot landscapes. During these times, the light is soft, warm, and directional, creating beautiful highlights and shadows. The golden light can transform an ordinary scene into something truly magical. Plan your shoots around the golden hours to maximize the impact of your photos. These are the most important landscape photography settings you can take advantage of.
Use Filters
Filters can be valuable tools for landscape photography. Polarizing filters reduce glare and reflections, saturate colors, and darken skies. Neutral density (ND) filters reduce the amount of light entering the lens, allowing you to use slow shutter speeds in bright conditions. Graduated neutral density (GND) filters darken the sky while leaving the foreground untouched, balancing the exposure in high-contrast scenes. Experimenting with different filters can open up new creative possibilities.
Composition is Key
Even with perfect settings, a poorly composed photo will not be compelling. Pay attention to the composition of your shots. Use leading lines to draw the viewer’s eye into the scene. Apply the rule of thirds to create a balanced and visually appealing composition. Look for interesting foreground elements to add depth and context to your photos. Composition is just as important as landscape photography settings.
Post-Processing
Post-processing is an essential part of the landscape photography workflow. Use software like Adobe Lightroom or Capture One to adjust the exposure, contrast, colors, and sharpness of your images. Be careful not to over-process your photos; the goal is to enhance the natural beauty of the scene, not to create something artificial. Subtle adjustments can make a big difference in the final result.
Conclusion
Mastering landscape photography settings is a journey that requires practice, experimentation, and a keen eye for detail. By understanding the exposure triangle, using the right shooting modes and focusing techniques, and paying attention to composition and post-processing, you can create stunning landscape photos that capture the beauty and wonder of the natural world. So grab your camera, head out into nature, and start exploring the endless possibilities of landscape photography.
Remember, the best landscape photography settings are the ones that allow you to express your creative vision and capture the essence of the scene. Don’t be afraid to experiment and break the rules to create unique and compelling images. Happy shooting!
