How to Get an Artist Page on TIDAL: A Comprehensive Guide
For emerging and established musicians alike, having a presence on major streaming platforms is crucial for reaching a wider audience and managing their online presence effectively. TIDAL, known for its high-fidelity audio and artist-centric approach, offers a valuable platform for artists to connect with their fans. This article provides a comprehensive guide on how to get an artist page on TIDAL, outlining the necessary steps, requirements, and best practices to ensure a successful launch. Understanding how to get an artist page on TIDAL will allow artists to take control of their music distribution and branding on this prominent platform.
Understanding the Importance of an Artist Page on TIDAL
Before diving into the process of how to get an artist page on TIDAL, it’s essential to understand why it’s important. An artist page on TIDAL serves as the central hub for your music, allowing fans to discover your discography, learn about your background, and stay updated on your latest releases. A dedicated artist page also enhances credibility and professionalism, signaling to listeners that you’re serious about your craft.
Furthermore, having an artist page on TIDAL provides access to valuable analytics and insights. You can track listener demographics, identify popular tracks, and understand how your music is performing on the platform. This data can inform your marketing strategies and help you make informed decisions about future releases.
Prerequisites for Claiming Your TIDAL Artist Page
Before you can claim your artist page on TIDAL, you need to ensure you meet certain prerequisites. These requirements are designed to verify your identity and ensure that you have the rights to manage your music on the platform.
Music Distribution
The first and most crucial step is to have your music distributed to TIDAL. TIDAL doesn’t allow artists to upload music directly to the platform. Instead, you’ll need to use a music distributor. Music distributors act as intermediaries between you and streaming services, ensuring that your music is properly formatted, tagged, and delivered to TIDAL and other platforms.
Popular music distributors include:
- DistroKid
- CD Baby
- TuneCore
- AWAL
- UnitedMasters
When choosing a distributor, consider factors such as pricing, royalty splits, reporting tools, and additional services offered. Some distributors may offer features like pre-save links, promotional tools, and access to artist support.
UPC and ISRC Codes
Each track and album you release will need a unique UPC (Universal Product Code) and ISRC (International Standard Recording Code). Your music distributor will typically provide these codes when you upload your music. These codes are essential for tracking your music and ensuring you receive proper royalties.
Existing Music on TIDAL
To claim your artist page, you must have at least one release already available on TIDAL. This release should be properly credited to your artist name. If you’re a new artist, this will involve releasing your first single or album through a music distributor.
Step-by-Step Guide: How to Get an Artist Page on TIDAL
Now that you understand the prerequisites, let’s walk through the step-by-step process of how to get an artist page on TIDAL.
Step 1: Sign Up for a TIDAL Account
If you don’t already have one, create a TIDAL account. You can sign up for a TIDAL account through their website or mobile app. You’ll need to provide your email address, create a password, and agree to their terms of service.
Step 2: Find Your Music on TIDAL
Once you have a TIDAL account, search for your music on the platform. Use your artist name and the title of one of your releases to locate your artist page. If your music is properly distributed, you should be able to find your releases on TIDAL.
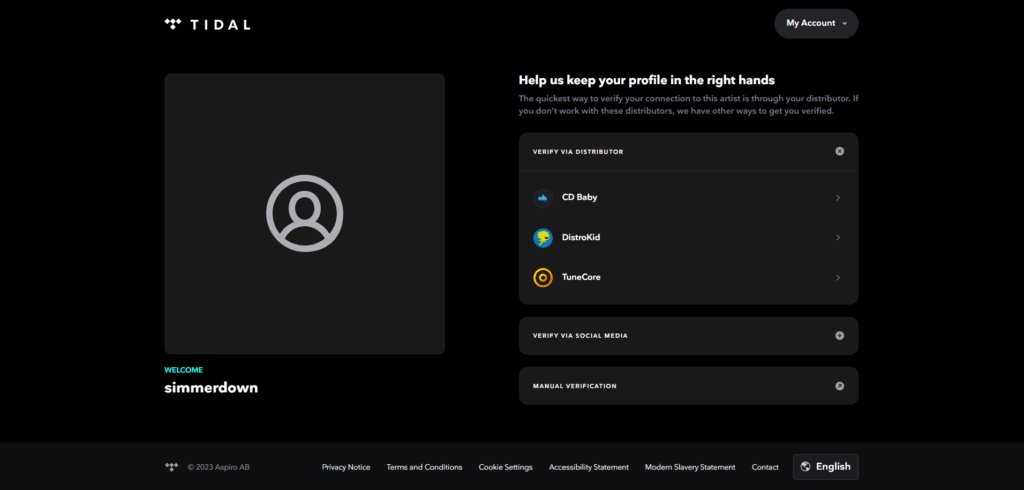
Step 3: Claim Your Artist Page Through Your Distributor
The most common way to claim your artist page on TIDAL is through your music distributor. Most distributors have a feature that allows you to claim and manage your artist profiles on various streaming platforms, including TIDAL. Here’s how it typically works:
- Log in to your distributor account.
- Navigate to the artist profile or streaming platform management section.
- Look for an option to claim your artist page on TIDAL.
- Follow the instructions provided by your distributor. This may involve providing your TIDAL account information and verifying your identity.
Each distributor’s process may vary slightly, so refer to your distributor’s help documentation or contact their support team if you need assistance.
Step 4: Verify Your Artist Page
After submitting your claim through your distributor, TIDAL will review your request to verify your identity and ensure that you’re the rightful owner of the artist page. This process may take a few days or weeks, depending on TIDAL’s workload.
Once your artist page is verified, you’ll receive a notification from your distributor or directly from TIDAL. You’ll then be able to access and manage your artist profile on TIDAL.
Step 5: Customize Your Artist Page
After gaining access to your artist page, take the time to customize it and make it your own. Here are some elements you can customize:
- Profile Picture: Upload a high-quality profile picture that represents your brand.
- Biography: Write a compelling biography that tells your story and highlights your achievements.
- Social Media Links: Add links to your social media profiles to connect with fans across different platforms.
- Artist Pick: Feature a specific track or album that you want to highlight.
A well-curated artist page can enhance your presence on TIDAL and make a positive impression on listeners.
Best Practices for Managing Your TIDAL Artist Page
Once you’ve claimed and customized your artist page, it’s essential to manage it effectively to maximize its impact. Here are some best practices to follow:
Keep Your Profile Updated
Regularly update your profile with new information, such as upcoming releases, tour dates, and news about your music. This keeps your fans engaged and ensures they have the latest information about your career.
Engage with Your Fans
TIDAL offers features that allow you to engage with your fans directly. Respond to comments, participate in discussions, and create playlists that showcase your music and influences. Building a strong connection with your fans can foster loyalty and encourage them to support your music.
Promote Your TIDAL Page
Promote your TIDAL artist page on your website, social media profiles, and in your email newsletters. Make it easy for fans to find and follow you on TIDAL. You can also create pre-save links for upcoming releases to generate excitement and ensure that your music is added to fans’ libraries on release day.
Track Your Analytics
Regularly monitor your analytics to understand how your music is performing on TIDAL. Pay attention to metrics such as streams, listeners, and demographics. This data can help you identify trends, understand your audience, and make informed decisions about your marketing strategies.
Troubleshooting Common Issues
While the process of how to get an artist page on TIDAL is generally straightforward, you may encounter some common issues. Here are some troubleshooting tips:
Unable to Find Your Music
If you can’t find your music on TIDAL, double-check that it has been properly distributed and that the release date has passed. Also, ensure that your artist name is correctly spelled and that the track and album titles are accurate.
Claim Request Rejected
If your claim request is rejected, it may be because of issues with your identity verification or ownership of the music. Contact your distributor or TIDAL support for assistance. Provide any documentation that supports your claim, such as contracts, licenses, or distribution agreements.
Difficulty Customizing Your Page
If you’re having trouble customizing your artist page, make sure you have the necessary permissions and that you’re following TIDAL’s guidelines for profile pictures, biographies, and other content. If you’re still experiencing issues, contact TIDAL support for technical assistance.
Alternatives to Claiming Through a Distributor
While claiming your artist page through a distributor is the most common method, there may be alternative options available. In some cases, TIDAL may offer a direct claim process for artists who meet certain criteria. Check TIDAL’s website or contact their support team for more information about alternative claim methods.
The Future of Artist Pages on TIDAL
As TIDAL continues to evolve and innovate, artist pages are likely to become even more powerful tools for musicians. Expect to see new features and functionalities that enhance the artist-fan connection, provide deeper insights into music performance, and offer more opportunities for monetization. Staying informed about these developments and adapting your strategies accordingly can help you maximize your presence and success on TIDAL. [See also: How to Promote Your Music on Streaming Platforms]
Conclusion
How to get an artist page on TIDAL is a vital step for any musician looking to establish a strong presence on this leading streaming platform. By following the steps outlined in this guide, you can claim your artist page, customize it to reflect your brand, and manage it effectively to connect with your fans and promote your music. Remember to stay updated on TIDAL’s latest features and best practices to maximize your success on the platform. Understanding how to get an artist page on TIDAL and properly managing it can significantly boost your career. Now that you know how to get an artist page on TIDAL, you can start building a strong presence on the platform. Claiming your artist page on TIDAL is a crucial step in your music career. This guide has shown you how to get an artist page on TIDAL so you can start connecting with your fans.
