How to Mix Henna Paste for Tattoos: A Comprehensive Guide
Creating stunning temporary tattoos with henna is an art form that requires precision, patience, and, most importantly, the right henna paste. The quality of your henna paste directly impacts the darkness, longevity, and overall appearance of your tattoo. This comprehensive guide will walk you through each step of how to mix henna paste for tattoos, ensuring you achieve professional-looking results every time. Whether you’re a beginner or an experienced henna artist, mastering the art of henna paste preparation is crucial. Understanding the ingredients, tools, and techniques involved will enable you to create beautiful and intricate designs that last. In this guide, we’ll cover everything from selecting the right henna powder to aftercare tips for a vibrant, long-lasting henna tattoo.
Understanding Henna and Its Properties
Before diving into the mixing process, it’s essential to understand what henna is and how it works. Henna is a natural dye derived from the leaves of the Lawsonia inermis plant. The leaves are dried, ground into a fine powder, and then mixed with liquids to create a paste that stains the skin. The staining power of henna comes from lawsone, a dye molecule that binds to the proteins in the skin’s outer layer. The color of the stain depends on various factors, including the quality of the henna powder, the pH of the paste, and the skin type. Fresh, high-quality henna powder is crucial for achieving a dark and lasting stain.
Essential Ingredients for Henna Paste
To make your own henna paste, you’ll need the following ingredients:
- Henna Powder: Opt for body art quality (BAQ) henna powder, which is finely sifted and free from impurities. Avoid hair-grade henna, as it may contain additives that are harmful to the skin.
- Liquid: Traditionally, lemon juice or a mixture of lemon juice and water is used. The acidity helps release the dye from the henna powder. Some artists also use strong tea or coffee for added color depth.
- Essential Oils: Certain essential oils, such as lavender, tea tree, or cajeput, contain monoterpenes that enhance the staining properties of henna. These oils help to penetrate the skin and produce a darker, longer-lasting stain.
- Sugar: Adding a small amount of sugar (such as table sugar or dextrose) helps to create a smooth, creamy paste that is easier to apply. It also makes the paste more pliable and prevents it from drying out too quickly.
Necessary Tools and Equipment
Having the right tools will make the mixing process easier and more efficient:
- Glass or Ceramic Bowl: Avoid using metal bowls, as they can react with the henna and affect the stain.
- Wooden or Plastic Spoon: Use a non-metallic spoon for mixing.
- Measuring Spoons and Cups: Accurate measurements are crucial for consistency.
- Plastic Wrap or Airtight Container: For storing the henna paste during dye release.
- Applicator Bottles or Cones: For applying the henna paste to the skin.
- Gloves: To protect your hands from staining.
Step-by-Step Guide: Mixing Henna Paste
Step 1: Sifting the Henna Powder
Start by sifting the henna powder through a fine-mesh sieve. This removes any lumps or impurities, ensuring a smooth paste. This step is crucial for achieving a consistent texture and preventing clogs in your applicator.
Step 2: Adding the Liquid
In a glass or ceramic bowl, gradually add the lemon juice or liquid of your choice to the sifted henna powder. Start with a small amount and mix thoroughly with a wooden or plastic spoon. Continue adding liquid until you achieve a thick, mashed potato-like consistency. Be careful not to add too much liquid at once, as it can make the paste too runny.
Step 3: Incorporating Essential Oils
Once the paste is smooth, add the essential oil. A general guideline is to use about 1-2 teaspoons of essential oil per 100 grams of henna powder. Mix well to ensure the oil is evenly distributed throughout the paste. The essential oil not only enhances the stain but also adds a pleasant aroma.
Step 4: Adding Sugar
Add a small amount of sugar to the paste. Start with about 1 teaspoon per 100 grams of henna powder. Mix well until the sugar is fully dissolved. The sugar will help to create a smooth and pliable paste.
Step 5: Dye Release
Cover the bowl with plastic wrap, pressing it directly onto the surface of the paste to prevent oxidation. Allow the paste to sit at room temperature for dye release. The dye release time varies depending on the henna powder and the temperature. Generally, it takes about 4-12 hours for the dye to fully release. You’ll know the dye is released when a small amount of paste smeared on a light-colored surface leaves an orange stain within a few minutes. This is a critical step in learning how to mix henna paste for tattoos.
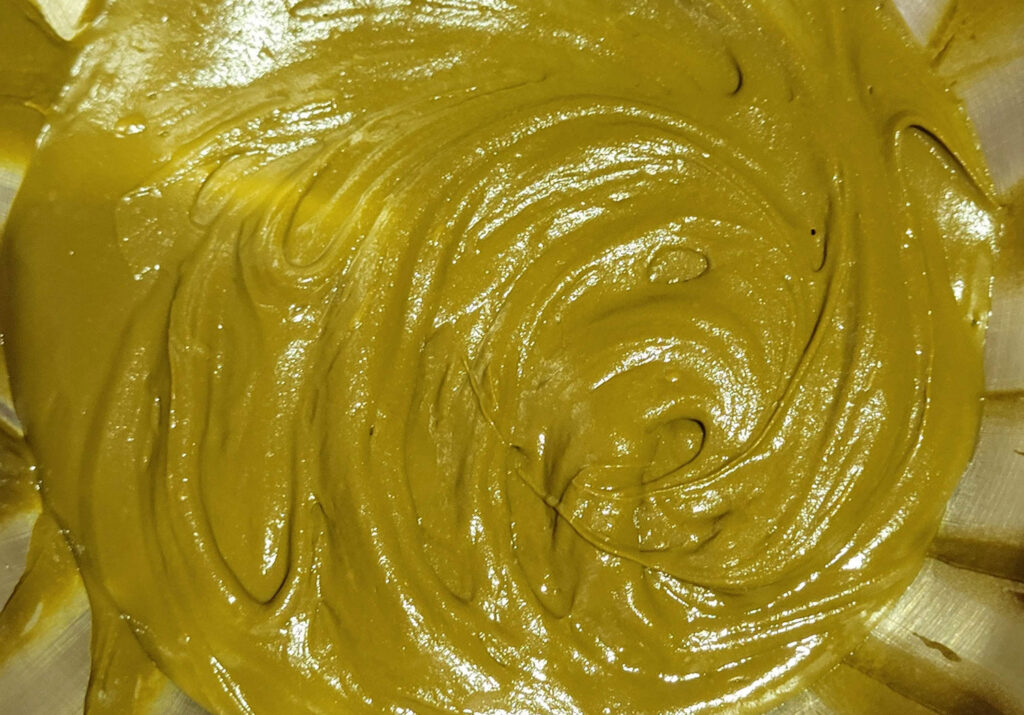
Step 6: Checking the Consistency
After the dye release, check the consistency of the paste. It should be smooth, creamy, and easily flowable. If the paste is too thick, add a small amount of liquid to thin it out. If it’s too runny, add a small amount of henna powder to thicken it. The ideal consistency is similar to yogurt or toothpaste.
Step 7: Filling Applicator Cones or Bottles
Once the paste is ready, transfer it to applicator cones or bottles. Make sure to remove any air bubbles to prevent uneven application. This can be done by gently tapping the cone or bottle on a hard surface. [See also: How to Make Henna Cones] Properly filled cones ensure precision and control when applying the henna.
Tips for Achieving the Perfect Henna Paste
- Use Fresh Ingredients: Always use fresh, high-quality henna powder and essential oils for the best results.
- Adjust Liquid Amount: The amount of liquid needed may vary depending on the henna powder. Adjust accordingly to achieve the desired consistency.
- Maintain Hygiene: Keep your tools and work area clean to prevent contamination.
- Test Patch: Before applying henna to a large area, perform a test patch to check for any allergic reactions.
- Proper Storage: Store leftover henna paste in the freezer to preserve its staining power. Thaw it before use.
Troubleshooting Common Issues
Even with the best intentions, you might encounter some issues while mixing henna paste. Here are some common problems and how to fix them:
- Paste is too runny: Add a small amount of henna powder to thicken it.
- Paste is too thick: Add a small amount of liquid to thin it out.
- Paste is grainy: Sift the henna powder more thoroughly or add a small amount of sugar.
- Stain is weak: Ensure the dye release time is sufficient and use high-quality henna powder and essential oils.
Applying Henna Paste for Tattoos
Now that you’ve mastered how to mix henna paste for tattoos, it’s time to apply it to the skin. Here are some tips for creating beautiful henna tattoos:
- Clean the Skin: Before applying henna, clean the skin with soap and water to remove any oils or lotions.
- Apply Stencil (Optional): If you’re using a stencil, apply it to the skin before applying the henna paste.
- Apply Henna Paste: Carefully apply the henna paste to the skin, following your desired design. Use even pressure to ensure a consistent application.
- Allow to Dry: Let the henna paste dry completely. This may take 30-60 minutes.
- Seal the Design: Once the paste is dry, seal the design with a mixture of lemon juice and sugar. This helps to keep the paste moist and prevent it from cracking.
- Leave On for Several Hours: For the darkest stain, leave the henna paste on for as long as possible, ideally 2-6 hours.
- Remove the Paste: Gently scrape off the dried henna paste. Avoid washing the area with water for at least 24 hours.
- Aftercare: Apply a natural oil, such as coconut oil or olive oil, to the area to moisturize the skin and protect the stain.
Aftercare Tips for a Long-Lasting Henna Tattoo
Proper aftercare is crucial for a vibrant and long-lasting henna tattoo:
- Avoid Water: Minimize contact with water for the first 24 hours after removing the paste. Water can fade the stain.
- Moisturize: Apply a natural oil, such as coconut oil or olive oil, to the area regularly to keep the skin moisturized.
- Avoid Soaps and Chemicals: Harsh soaps and chemicals can fade the stain. Use gentle, natural cleansers if necessary.
- Avoid Exfoliation: Avoid exfoliating the skin in the area of the tattoo, as this can remove the stained skin cells.
- Protect from Sun: Prolonged sun exposure can fade the stain. Protect the area with clothing or sunscreen.
The Science Behind Henna Staining
The staining process of henna involves several chemical reactions. The lawsone molecules in the henna paste bind to the keratin in the skin’s outer layer. The acidity of the lemon juice helps to release the lawsone molecules from the henna powder, while the essential oils enhance their penetration into the skin. The longer the henna paste remains in contact with the skin, the more lawsone molecules bind to the keratin, resulting in a darker and longer-lasting stain. The quality of the henna powder and the freshness of the ingredients also play a significant role in the staining process. [See also: Natural Dyes for Skin]
Choosing the Right Henna Powder
Selecting the right henna powder is crucial for achieving the desired results. Body art quality (BAQ) henna powder is finely sifted and free from impurities, ensuring a smooth paste and a dark stain. Avoid hair-grade henna, as it may contain additives that are harmful to the skin. Look for henna powder that is finely ground and has a greenish-brown color. Fresh henna powder will have a strong, earthy aroma. Store henna powder in an airtight container in a cool, dark place to preserve its staining power. The better the quality of the henna powder, the better the result of your henna tattoo. This is why understanding how to mix henna paste for tattoos starts with the powder itself.
Essential Oils and Their Role
Essential oils play a vital role in enhancing the staining properties of henna. Certain essential oils, such as lavender, tea tree, and cajeput, contain monoterpenes that help to penetrate the skin and produce a darker, longer-lasting stain. These oils also add a pleasant aroma to the henna paste. When choosing essential oils, opt for pure, therapeutic-grade oils that are safe for topical use. Avoid using fragrance oils, as they do not contain the necessary monoterpenes and may irritate the skin. The right essential oil can significantly improve the darkness and longevity of your henna tattoo.
Conclusion
Mastering how to mix henna paste for tattoos is essential for creating beautiful and long-lasting designs. By understanding the ingredients, tools, and techniques involved, you can achieve professional-looking results every time. Remember to use fresh, high-quality henna powder, essential oils, and follow the steps outlined in this guide. With practice and patience, you’ll be able to create stunning henna tattoos that you and your clients will love. From choosing the right henna powder to mastering the dye release, each step contributes to the final outcome. So, embrace the art of henna and enjoy the process of creating unique and intricate designs. The perfect henna paste is the foundation of a beautiful and lasting henna tattoo, and now you have the knowledge to create it yourself. Experiment with different liquids and essential oils to find the perfect recipe for your skin type and preferences. Happy henna-ing!
