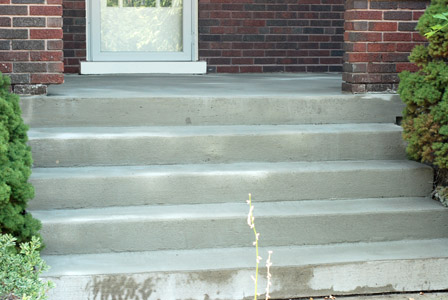
DIY Guide: How to Patch Your Cement Porch Like a Pro
A cracked or crumbling cement porch isn’t just an eyesore; it’s a safety hazard. Over time, exposure to the elements, freeze-thaw cycles, and general wear and tear can lead to significant damage. Luckily, with the right materials and techniques, you can tackle a cement porch patch yourself and restore your porch to its former glory. This comprehensive guide will walk you through the entire process, from assessing the damage to applying the final sealant.
Assessing the Damage and Gathering Supplies
Before you even think about mixing cement porch patch, take a good look at the extent of the damage. Is it a small crack, a large chunk missing, or widespread surface deterioration? This will determine the type and amount of materials you need. For minor cracks and surface imperfections, a pre-mixed cement porch patch compound might suffice. For larger repairs, you’ll need a more substantial concrete mix.
Essential Supplies:
- Cement Porch Patch or Concrete Mix: Choose a product specifically designed for patching concrete. Look for terms like “polymer-modified” or “high-strength” for better durability.
- Safety Glasses: Protect your eyes from dust and debris.
- Work Gloves: Protect your hands from the alkaline nature of cement.
- Chisel and Hammer: For removing loose or crumbling concrete.
- Wire Brush: For cleaning and preparing the surface.
- Shop Vacuum: For removing dust and debris.
- Mixing Bucket: For mixing the cement porch patch.
- Trowel: For applying and smoothing the patch.
- Water: For mixing the concrete.
- Concrete Bonding Agent (Optional): Improves adhesion between the old and new concrete.
- Concrete Sealer (Optional): Protects the patched area from future damage.
- Stiff Brush: For texturing the patch to match the existing concrete (optional).
Preparing the Surface: The Key to a Lasting Repair
Proper surface preparation is crucial for a successful cement porch patch. The new patch needs a clean, stable surface to bond to. If the surface is dirty, loose, or contaminated, the patch will eventually fail. Here’s how to prepare the surface:
- Remove Loose Concrete: Use a chisel and hammer to carefully remove any loose or crumbling concrete from the damaged area. Be thorough; you want to create a solid base for the patch.
- Clean the Surface: Use a wire brush to scrub away any dirt, debris, and loose particles. A shop vacuum is excellent for removing dust from the pores of the concrete.
- Apply Concrete Bonding Agent (Optional): If you’re using a concrete bonding agent, apply it according to the manufacturer’s instructions. This will improve the adhesion between the old and new concrete, especially for larger repairs.
- Dampen the Surface: Lightly dampen the area with water before applying the cement porch patch. This helps prevent the old concrete from absorbing moisture from the new patch too quickly, which can lead to cracking.
Mixing and Applying the Cement Porch Patch
Now comes the fun part: mixing and applying the cement porch patch. Follow the manufacturer’s instructions carefully when mixing the concrete. Adding too much or too little water can weaken the final product.
- Mix the Concrete: Add water to the cement porch patch mix gradually, mixing thoroughly until you achieve a thick, workable consistency. It should be similar to the consistency of peanut butter.
- Apply the Patch: Use a trowel to apply the cement porch patch to the prepared area. Press it firmly into the damaged area, ensuring it fills all cracks and voids. For deeper repairs, apply the patch in layers, allowing each layer to partially dry before adding the next. This prevents the patch from shrinking and cracking.
- Smooth the Surface: Use the trowel to smooth the surface of the patch, blending it seamlessly with the surrounding concrete. Take your time and aim for a smooth, even finish.
- Texture the Patch (Optional): If you want the patch to match the texture of the existing concrete, use a stiff brush or sponge to create a similar texture. This is especially important for larger patches that are highly visible.
Curing and Sealing the Cement Porch Patch
Curing is the process of keeping the cement porch patch moist so it can properly hydrate and gain strength. Proper curing is essential for a durable and long-lasting repair. Sealing the patch provides additional protection from the elements.
- Cure the Patch: Cover the cement porch patch with plastic sheeting or damp burlap for at least 24-48 hours. This will help retain moisture and prevent the patch from drying out too quickly. You can also mist the patch with water several times a day to keep it moist.
- Apply Concrete Sealer (Optional): Once the patch has fully cured (follow the manufacturer’s instructions for curing time), you can apply a concrete sealer to protect it from future damage. Choose a sealer that is specifically designed for concrete porches and follow the manufacturer’s instructions for application.
Troubleshooting Common Cement Porch Patch Problems
Even with careful preparation and application, some problems can arise when patching a cement porch. Here are some common issues and how to address them:
- Cracking: Cracking can occur if the patch dries out too quickly, if the concrete mix is too weak, or if the surface preparation was inadequate. To prevent cracking, ensure proper curing and use a high-quality cement porch patch mix.
- Delamination: Delamination is when the patch separates from the existing concrete. This is usually caused by poor surface preparation or a lack of bonding agent. To prevent delamination, thoroughly clean and prepare the surface and use a concrete bonding agent.
- Color Mismatch: It can be challenging to match the color of the new patch to the existing concrete. To minimize color mismatch, try to find a cement porch patch mix that is similar in color to your existing concrete. You can also experiment with adding pigments to the mix to achieve a closer match.
Choosing the Right Cement Porch Patch Product
The market offers a wide variety of cement porch patch products, each with its own strengths and weaknesses. Here’s a breakdown of some common types:
- Pre-Mixed Patching Compounds: These are convenient for small repairs and are easy to use. However, they may not be as strong or durable as traditional concrete mixes.
- Polymer-Modified Concrete Mixes: These mixes contain polymers that improve their adhesion, strength, and durability. They are a good choice for larger repairs and areas that are exposed to heavy traffic.
- Hydraulic Cement: This type of cement sets very quickly, even underwater. It’s ideal for stopping leaks and making quick repairs.
When choosing a cement porch patch product, consider the size and severity of the damage, the expected traffic load, and the climate conditions in your area. Read reviews and compare products to find the best option for your needs.
Preventing Future Damage to Your Cement Porch
Once you’ve successfully patched your cement porch, take steps to prevent future damage. Here are some tips:
- Seal Your Porch: Apply a concrete sealer every few years to protect the concrete from water damage, stains, and other environmental factors.
- Repair Cracks Promptly: Address cracks as soon as they appear to prevent them from widening and causing further damage.
- Avoid De-icing Salts: De-icing salts can damage concrete. Use sand or other non-corrosive de-icing alternatives.
- Clean Regularly: Regularly sweep and clean your porch to remove dirt, debris, and stains.
Conclusion: A Well-Maintained Porch Enhances Your Home
Patching your cement porch is a manageable DIY project that can save you money and improve the appearance and safety of your home. By following these steps and taking preventative measures, you can keep your porch in good condition for years to come. Remember to prioritize safety, choose the right materials, and take your time to ensure a lasting repair. A well-maintained porch not only enhances your home’s curb appeal but also provides a welcoming space for relaxation and enjoyment. [See also: Concrete Repair Basics] [See also: Choosing the Right Concrete Sealer]
